
A Beginner's Guide to PosterMyWall
Welcome! PosterMyWall enables you to create all kinds of graphics for personal and commercial use all on your own without help from a professional graphic designer. In this quick guide to PosterMyWall, we’ll have a look at:
The PosterMyWall homepage.
How to go to the My Stuff page, Edit Profile page, Order History and learn their uses.
How to go from the homepage to the PosterMyWall Editor.
Basic functions of the PosterMyWall Editor.
Without further delay, let’s begin!
The PosterMyWall Homepage
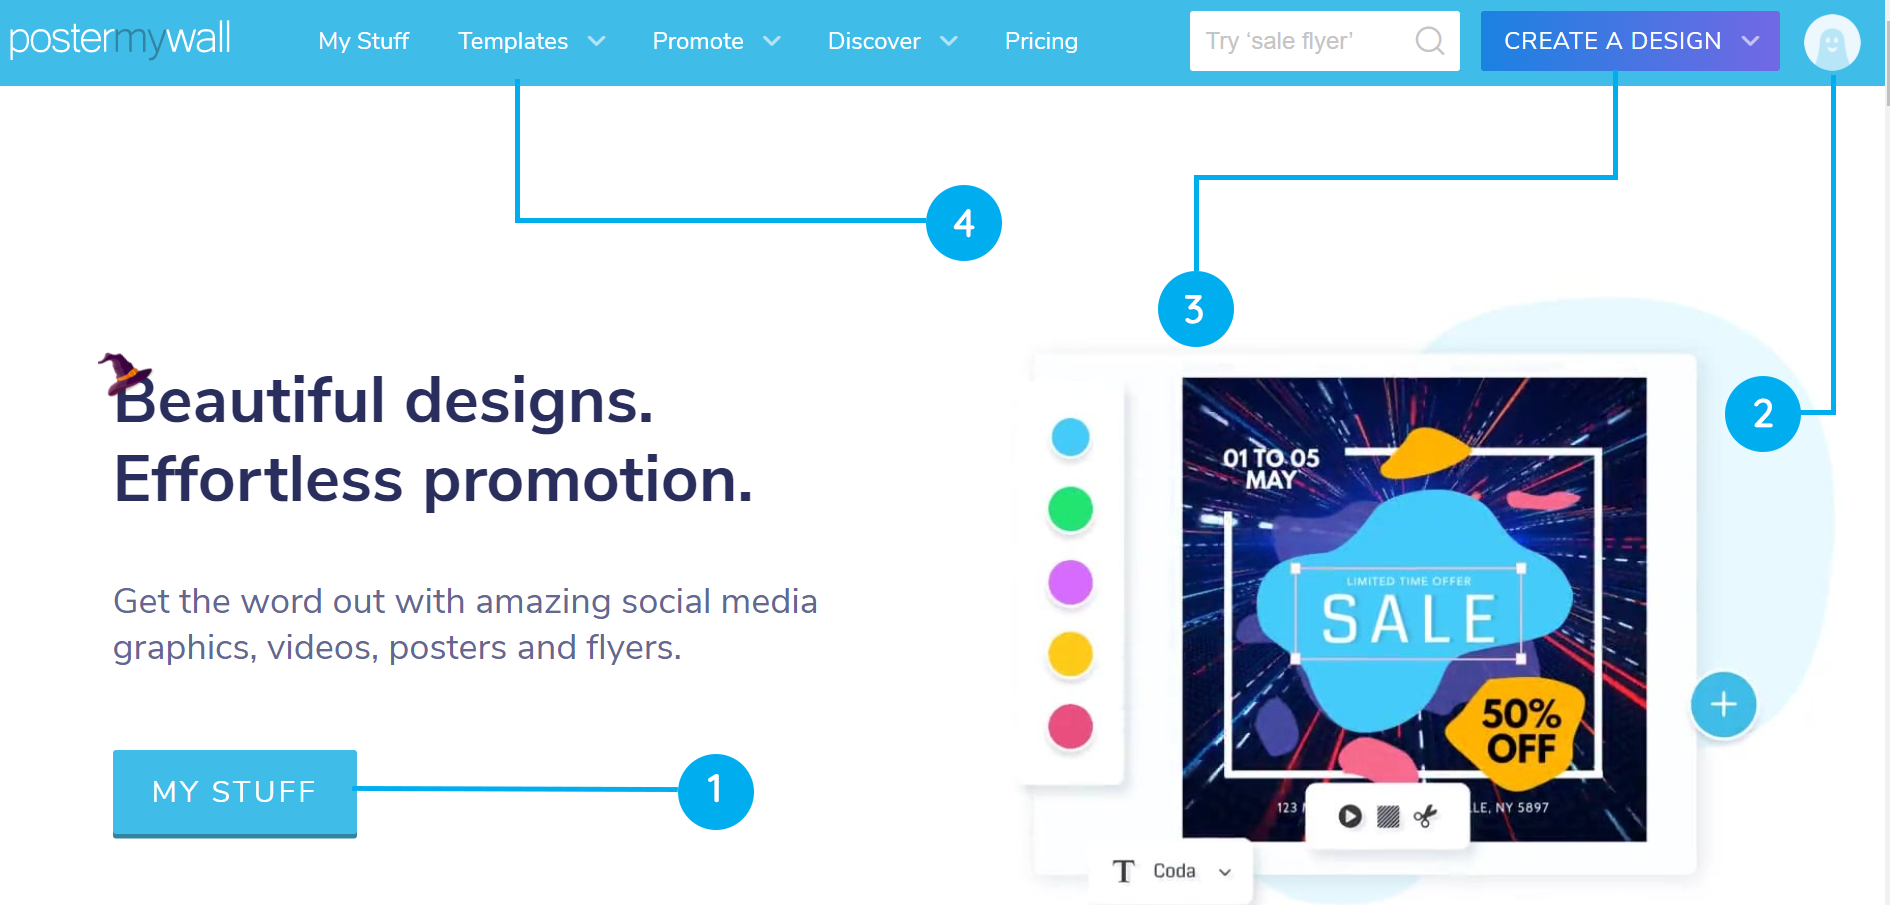
This is the PosterMyWall homepage. To get you better acquainted with the page, we’ve divided the page to 4 parts you should know about:
The My Stuff page - The My Stuff page is your home base. Everything you create and save will find its place here. You can also organize your work in folders, and share it with others from here.
Profile Avatar - Mousing over your profile avatar allows easy access to many of the site’s options, such as your Order History, Edit Profile settings, log in and log out options and the Help Center.
Create a Design - This is why you came to PosterMyWall in the first place. Click this option to start designing.
Templates - Use the templates option to search for all kinds of design templates, based on size or themes. Click ‘view all’ to head over to the templates gallery, filtered by size or theme.
Search
The PosterMyWall gallery allows you to browse various template categories on the site, but if you’re looking for something niche, like archery flyers, the search box is just for you. Find the search box on the site navigation.

Type whatever you’re looking for, say ‘save the date card’ and everything related to save the date will come up. You can filter your searches in a number of ways.
Click image or video to show only image or video results respectively. Set as any to show both image and video results.
Right below the search box, you’ll find various template category recommendations based on your search.
Use the Browse by size tab to filter results based on size. Filtering it as digital display will only show templates using digital display dimensions, both landscape and portrait.
Clicking any of the displayed templates will open an enlarged preview, as shown below.

Click the preview again to open the design in the PosterMyWall editor.
Basics of the PosterMyWall Editor

The PosterMyWall editor is all about simplifying design, with the help of easy drag and drop options, and built in libraries to browse and use additional content, such as stock images and videos, clipart and shapes.
Now we will look at some of the most basic parts of the PosterMyWall editor to get you started with designing. To familiarize yourself with the editor, here are its 6 most basic parts, useful for all kinds of designs:
Background - Use this option to change your background, and you have a variety of options, which include:
Solid Colored Backgrounds: Choose a solid color for your background.
Gradient Backgrounds: Use this to set two-colored backgrounds with a linear or radial gradient.
Transparent Background: This is a must have if you’re creating logos and vector designs.
Upload Background: Use this to upload a background from your device.
Stock Photo Background: Use this option to browse stock photos from Storyblocks, GettyImages, Pixabay or PosterMyWall.
Media - Use this option to add videos and audio to your design. These options include:
Add from My Videos - Upload a video from your device to use in your design.
Add Stock Video - Browse and pick a video from our stock video resources to use in your design.
Add from My Audio - Upload an audio file from your device to use in your design.
Add Stock Audio - Browse and pick audio clips from our stock audio resources. You can add multiple audio files to your design.
Photo - Use this option to add a photo. You have multiple options to add photos in your design. These are:
My Photos: This allows you to add photos from your device.
Stock Photos: Use this option to add stock photos from Storyblocks, GettyImages, Pixabay and Flickr.
Add from Facebook: Browse and add photos from your connected Facebook account’s albums and photos to your design.
Add from Google Drive: Add photos directly from your connected Google Drive to your design.
Add from Dropbox: Add photos directly from your Dropbox account to your design.
Layout - Add from various layout options to create specific kinds of designs, such as menus and schedules.
Add Schedule - Choose from various schedule layout options to create a sports or concert schedule.
Add Menu - Choose from various menu layouts, add your menu items and create a menu.
Add Table - Add a table to neatly display any kind of data in your design.
Add Tear-off Tabs - Add tear-off tabs to your flyer with contact information.
Text - Text allows you to add text boxes, and even menu layouts to your design. Here are the text options.
Add Plain text: This is the backbone of any of your designs. When your text box is selected, you’ll find a variety of font options. You can also change the font size, color, alignment, line height and kerning.
Add Fancy text: Add vibrant, texture heavy text items.
Add Menu: If you’re creating a menu, this is a must use option.
Add Animation: Use this option to animate your text, and to present more in less space.
Clipart - Use this option to add shapes and clipart in your design:
Add Shape: Add geometric shapes, such as squares, triangles and circles, and other shapes such as arrows and price tags.
Add Clipart: Browse and add stock clipart from Pixabay and Storyblocks.
Save - Once you’re done designing, save the design. Saved designs will appear in your My Stuff page, and can be edited, copied, downloaded and removed at any time.
Download - Get a free download, which are great for sharing online, or if you’re looking for a higher resolution download for prints and videos, you can also purchase a paid download via the download option.
If you’re designing for the first time, we highly recommend starting by browsing our gallery of thousands of templates. To learn more about PosterMyWall, check out the Getting Started section in the Help Center or graphic design tutorials if you’re looking for guides in video format.

![10 Black Friday Trends Retailers Must Know in 2019 [Infographic]](https://images.squarespace-cdn.com/content/v1/573bf9761bbee0b32db4e9ff/1572341742451-BNASLM0NV4BFNA0SHDXM/infographic_blackfriday_02.png)

